[alert] This tutorial is deprecated, and has been replaced by Lessons 7, 8, 9, and 10 in the Lessons section [/alert]
Tutorial 5 - Dataobject Relationship Management#
Overview#
This tutorial explores the relationship and management of DataObjects. It builds on the second tutorial where we learnt how to define additional fields on our models, and attach images to them.
What are we working towards?#
To demonstrate relationships between objects, we are going to use the example of students working on various projects. Each student has a single project, and each project has one or more mentors supervising their progress. We'll create these objects, make them editable in the CMS, and render them on the website.
This table shows some example data we'll be using:
| Project | Student | Mentor |
|---|---|---|
| Developer Toolbar | Jakob,Ofir | Mark,Sean |
| Behaviour Testing | Michal,Wojtek | Ingo, Sean |
| Content Personalization | Yuki | Philipp |
| Module Management | Andrew | Marcus,Sam |
Has-One and Has-Many Relationships: Project and Student#
A student can have only one project, it'll keep them busy enough.
But each project can be done by one or more students.
This is called a one-to-many relationship.
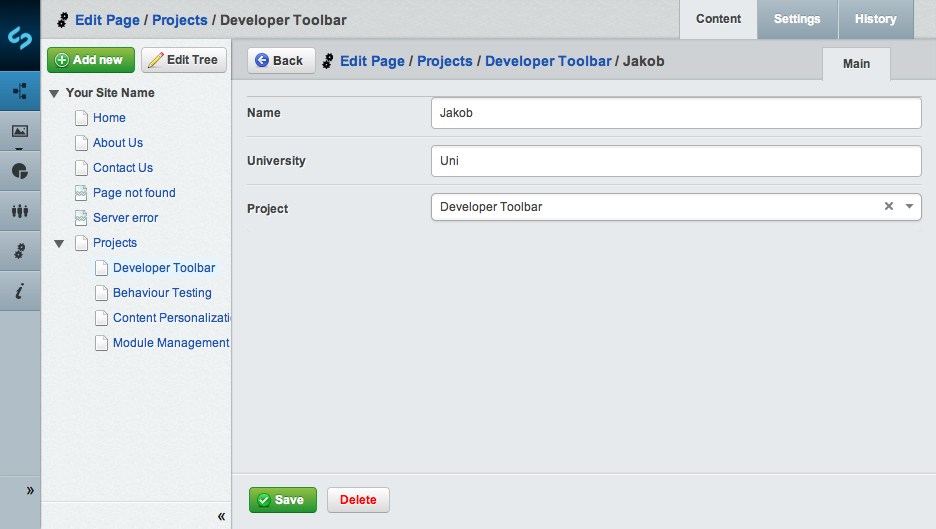
Let's create the Student and Project objects.
mysite/code/Student.php
	<?php
	class Student extends DataObject {
		private static $db = array(
			'Name' => 'Varchar',
			'University' => 'Varchar',
		);
		private static $has_one = array(
			'Project' => 'Project'
		);
	}
	<?php
	class Project extends Page {
		private static $has_many = array(
			'Students' => 'Student'
		);
	}
	class Project_Controller extends Page_Controller {
	}
and $has_many properties on the objects.
The array keys declares the name of the relationship,
the array values contain the class name
(see the "datamodel"
topic for more information).
As you can see, only the Project model extends Page,
while Student is a plain DataObject subclass.
This allows us to view projects through the standard
theme setup, just like any other page.
It would be possible to render students separately as well,
but for now we'll assume they're just listed as part of their Project page.
Since Project inherits all properties (e.g. a title) from its parent class,
we don't need to define any additional ones for our purposes.
Now that we have our models defined in PHP code, we need to tell the database to create the related tables. Trigger a rebuild through dev/build before you proceed to the next part of this tutorial.
Organizing pages: ProjectHolder#
A Project is just a page, so we could create it anywhere in the CMS.
In order to list and organize them, it makes sense to collect them under a common parent page.
We'll create a new page type called ProjectsHolder for this purpose,
which is a common pattern in SilverStripe's page types. Holders
are useful for listing their children, and usually restrict these children to a specific class,
in our case pages of type Project.
The restriction is enforced through the $allowed_children directive.
mysite/code/ProjectsHolder.php
	<?php
	class ProjectsHolder extends Page {
		private static $allowed_children = array(
			'Project'
		);
	}
	class ProjectsHolder_Controller extends Page_Controller {
	}
to a project. That's because it's already inherited from the parent implementation, as part of the normal page hierarchy in the CMS.
Now that we have created our ProjectsHolder and Project page types, we'll add some content.
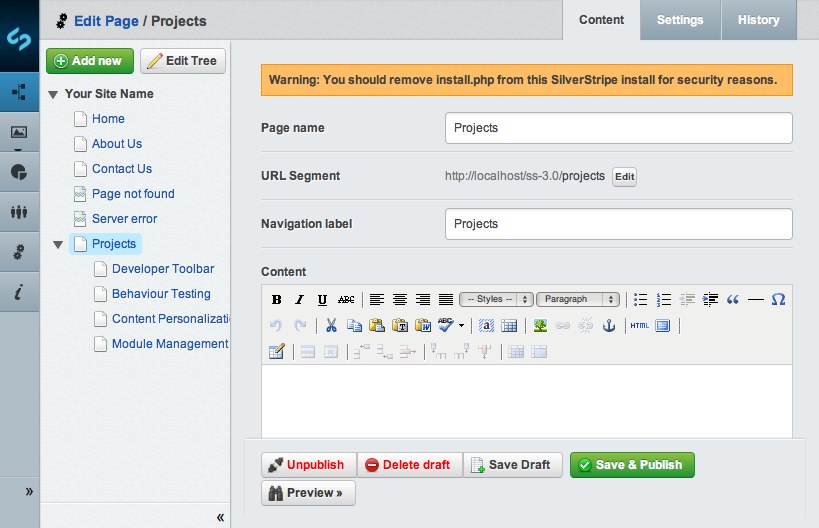
Go into the CMS and create a ProjectsHolder page named Projects.
Then create one Project page for each project listed above.
Data Management Interface: GridField#
So we have our models, and can create pages of type
Project through the standard CMS interface,
and collect those within a ProjectsHolder.
But what about creating Student records?
Since students are related to a single project, we will
allow editing them right on the CMS interface in the Project page type.
We do this through a powerful field called [GridField](/reference/grid-field).
All customization to fields for a page type are managed through a method called
getCMSFields(), so let's add it there:
mysite/code/Project.php
	<?php
	class Project extends Page {
		// ...
		public function getCMSFields() {
			// Get the fields from the parent implementation
			$fields = parent::getCMSFields();
			// Create a default configuration for the new GridField, allowing record editing
			$config = GridFieldConfig_RelationEditor::create();
			// Set the names and data for our gridfield columns
			$config->getComponentByType('GridFieldDataColumns')->setDisplayFields(array(
				'Name' => 'Name',
				'Project.Title'=> 'Project' // Retrieve from a has-one relationship
			));
			// Create a gridfield to hold the student relationship
			$studentsField = new GridField(
				'Students', // Field name
				'Student', // Field title
				$this->Students(), // List of all related students
				$config
			);
			// Create a tab named "Students" and add our field to it
			$fields->addFieldToTab('Root.Students', $studentsField);
			return $fields;
		}
	}
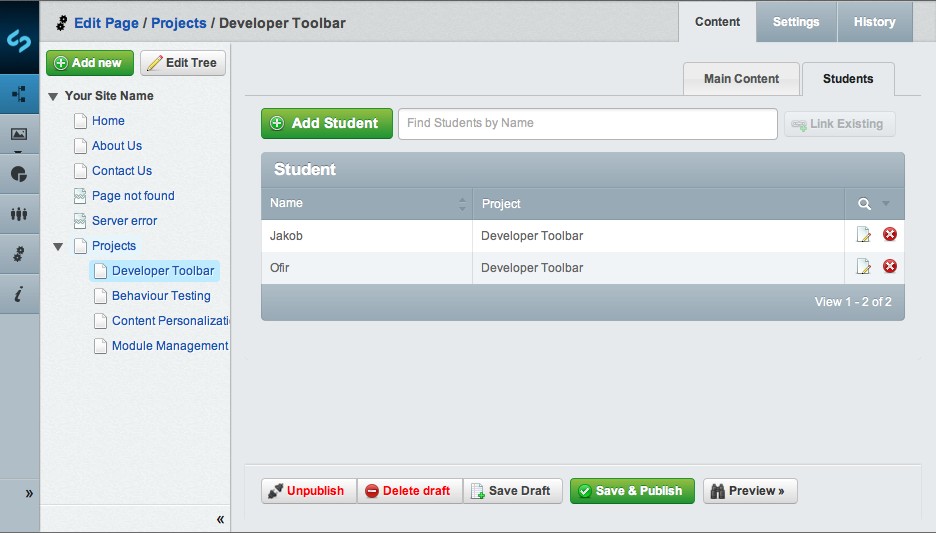
It's empty by default, but you can add new students as required, or relate them to the project by typing in the box above the table.
In our case, we want to manage those records, edit their details, and add new ones.
To accomplish this, we have added a specific GridFieldConfig.
While we could've built the config from scratch, there's several
preconfigured instances. The GridFieldConfig_RecordEditor default configures
the field to edit records, rather than just viewing them.
The GridField API is composed of "components", which makes it very flexible.
One example of this is the configuration of column names on our table:
We call setDisplayFields() directly on the component responsible for their rendering.
[note]
Adding a GridField to a page type is a popular way to manage data,
but not the only one. If your data requires a dedicated interface
with more sophisticated search and management logic, consider
using the ModelAdmin
interface instead.
[/note]
Select each Project page you have created before,
go in the tab panel called "Students", and add all students as required,
by clicking on the link Add Student of your GridField table.
Once you have added all the students, and selected their projects, it should look a little like this:
Many-many relationships: Mentor#
Now we have a fairly good picture of how students relate to their projects. But students generally have somebody looking them over the shoulder. In our case, that's the "mentor". Each project can have many of them, and each mentor can have one or more projects. They're busy guys! This is called a many-many relationship.
The first step is to create the Mentor object and set the relation with the Project page type.
mysite/code/Mentor.php
	<?php
	class Mentor extends DataObject {
		private static $db = array(
			'Name' => 'Varchar',
		);
		private static $belongs_many_many = array(
			'Projects' => 'Project'
		);
	}
	class Project extends Page {
		// ...
		private static $many_many = array(
			'Mentors' => 'Mentor'
		);
	}
(after you've performed a dev/build command, of course).
The second step is to add the table in the method getCMSFields(),
which will allow you to manage the many_many relation.
Again, GridField will come in handy here, we just have
to configure it a bit differently.
mysite/code/Project.php
	class Project extends Page {
		// ...
		public function getCMSFields() {
			// ...
			// Same setup, but for mentors
			$mentorsField = new GridField(
				'Mentors',
				'Mentors',
				$this->Mentors(),
				GridFieldConfig_RelationEditor::create()
			);
			$fields->addFieldToTab('Root.Mentors', $mentorsField);
			return $fields;
		}
	}
of $this->Mentor() (rather than Mentor::get()). It will limit
the list of records to those related through the many-many relationship.
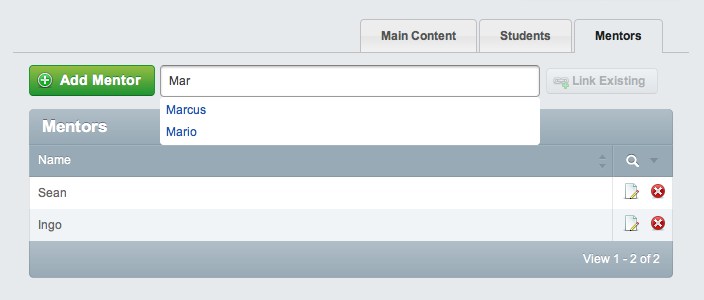
In the CMS, open one of your Project pages and select the "Mentors" tab.
Add all the mentors listed above
by clicking on the Add Mentor button.
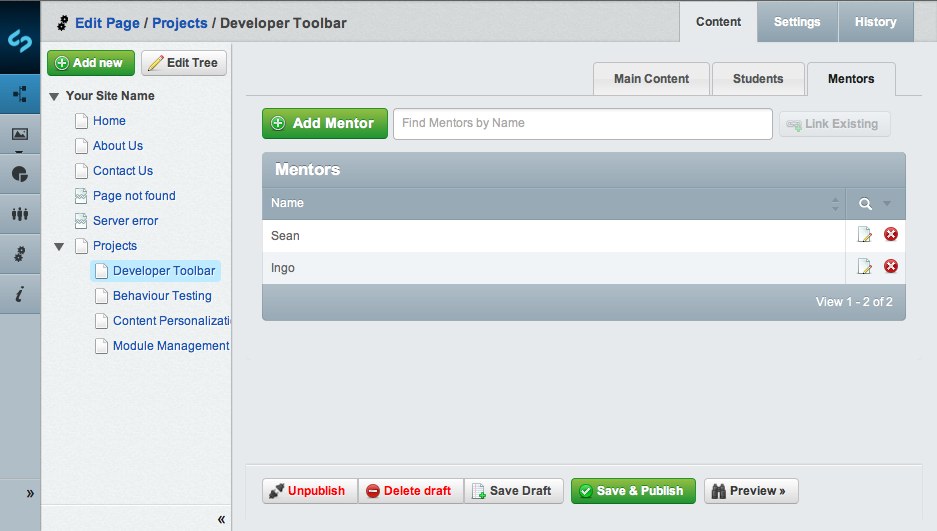
To associate the mentor with a project, select one of the mentors, and click on the projects tab. Add all the projects a mentor is associated with (see the list), by typing the name in "Find Projects by Page name" and clicking the "Link Existing" button.
You will notice that you are able to select the same Project for multiple mentors.
This is the definition of a many-to-many relation.
Website Display#
Now that we have created all the Page and DataObject classes necessary and the relational tables to manage the relations between them, we would like to see these relations on the website. We will see in this section how to display all these relations, but also how to create a template for a DataObject.
For every kind of Page or DataObject, you can access to their relations thanks to the control loop.
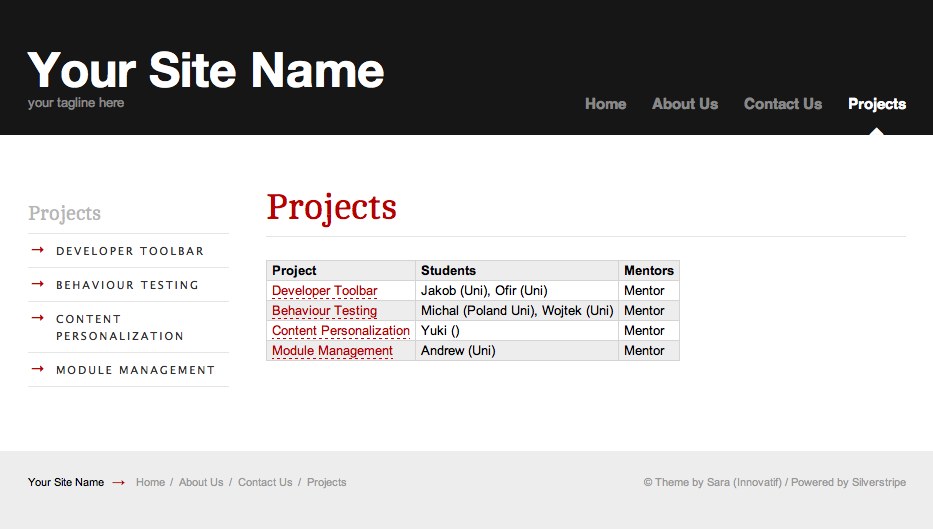
Projects Overview Template#
We'll start by creating a ProjectsHolder template,
which lists all projects, and condenses their
student and mentor relationships into a single line.
You'll notice that there's no difference between
accessing a "has-many" and "many-many" relationship
in the template loops: to the template, it's just
a named list of object.
themes/simple/templates/Layout/ProjectsHolder.ss
	<% include SideBar %>
	<div class="content-container unit size3of4 lastUnit">
		<article>
			<h1>$Title</h1>
			<div class="content">
				$Content
				<table>
					<thead>
						<tr>
							<th>Project</th>
							<th>Students</th>
							<th>Mentors</th>
						</tr>
					</thead>
					<tbody>
					<% loop $Children %>
						<tr>
							<td>
								<a href="$Link">$Title</a>
							</td>
							<td>
								<% loop $Students %>
									$Name ($University)<% if $Last !=1 %>,<% end_if %>
								<% end_loop %>
							</td>
							<td>
								<% loop $Mentors %>
									$Name<% if $Last !=1 %>,<% end_if %>
								<% end_loop %>
							</td>
						</tr>
					<% end_loop %>
					</tbody>
					</table>
			</div>
		</article>
	</div>
or the "Preview" feature in the CMS. You should see a list of all projects now.
Add ?flush=1 to the page URL to force a refresh of the template cache.
To get a list of all projects, we've looped through the "Children" list, which is a relationship we didn't define explictly. It is provided to us by the parent implementation, since projects are nothing other than children pages in the standard page hierarchy.
Project Detail Template#
Creating the detail view for each Project page works in a very similar way.
Given that we're in the context of a single project,
we can access the "Students" and "Mentors" relationships directly in the template.
themes/simple/templates/Layout/Project.ss
	<% include SideBar %>
	<div class="content-container unit size3of4 lastUnit">
		<article>
			<h1>$Title</h1>
			<div class="content">
				$Content
				<h2>Students</h2>
				<% if $Students %>
					<ul>
					<% loop $Students %>
						<li>$Name ($University)</li>
					<% end_loop %>
					</ul>
				<% else %>
					<p>No students found</p>
				<% end_if %>
				<h2>Mentors</h2>
				<% if $Mentors %>
					<ul>
					<% loop $Mentors %>
						<li>$Name</li>
					<% end_loop %>
					</ul>
				<% else %>
					<p>No mentors found</p>
				<% end_if %>
			</div>
		</article>
	</div>
or navigate to it through the submenu provided by the theme.
Student Detail Template#
You might have noticed that we duplicate the same template code between both views when it comes to displaying the details on students and mentors. We'll fix this for students, by introducing a new template for them.
themes/simple/templates/Includes/StudentInfo.ss
$Name ($University)
	class Student extends DataObject {
		function getInfo() {
			return $this->renderWith('StudentInfo');
		}
	}
and ProjectHolder.ss templates with the new placeholder, $Info.
That's the code enclosed in <% loop $Students %> and <% end_loop %>.
With this pattern, you can increase code reuse across templates.
Summary#
This tutorial has demonstrated how you can manage data with
different types of relations between in the CMS,
and how you can display this data on your website.
We illustrated how the powerful Page class can be useful to structure
your own content, and how we can correlate it to more
lightweight DataObject classes. The transition between
the two classes is intentionally fluent in the CMS, you can
manage them depending on your needs.
DataObject gives you a no-frills solution to data storage,
but Page allows for built-in WYSIWYG editing, versioning,
publication and hierarchical organization.
Exercises#
This is a simplified example, so there's naturally room for improvement. In order to challenge your knowledge gained in the tutorials so far, we suggest some excercises to make the solution more flexible:
- Refactor the
StudentandMentorclasses to inherit from a common parent classPerson, and avoid any duplication between the two subclasses. - Render mentor details in their own template
- Change the
GridFieldto list only five records per page (the default is 20). This configuration is stored in the GridFieldPaginator component