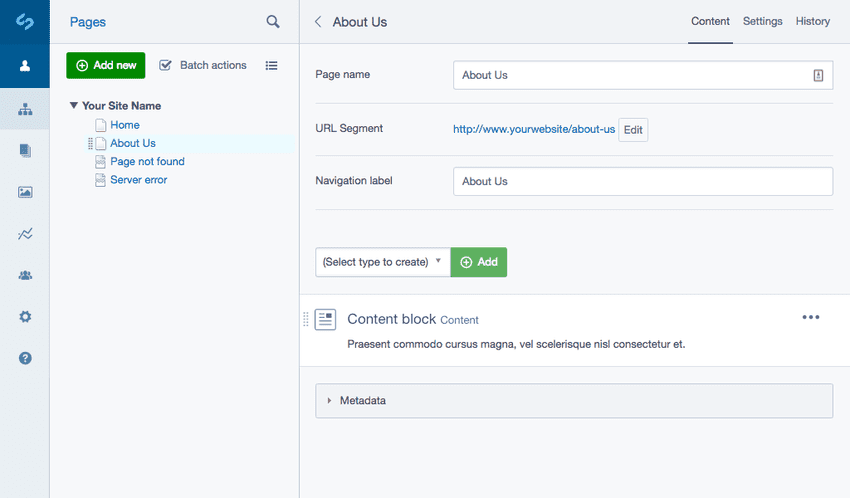
Basic setup
Installation
composer require dnadesign/silverstripe-elementalThe following YAML config will enable elements on every Page object,
replacing the standard Content rich text field.
# app/_config/elements.yml
Page:
extensions:
- DNADesign\Elemental\Extensions\ElementalPageExtensionIn your page type layout template use $ElementalArea to render the elements to the page (in place of $Content).
Getting more elements
Note that this module comes by default with the base element and a "Content" element. If you need more, take a look at some other modules:
Silverstripe CMS supported content block modules
View Silverstripe CMS supported modules.
To learn more about Silverstripe CMS supported modules content block types see, Creating new blocks.
- dnadesign/silverstripe-elemental: Text content (built-in)
- silverstripe/silverstripe-elemental-fileblock: File and image block
- silverstripe/silverstripe-elemental-bannerblock: Banner with call-to-action and content
- dnadesign/silverstripe-elemental-userforms: Embed a user defined form
Configuration
Limit to specific page type
If you want to use elements alongside traditional page types, you can define an "empty" page type and assign the extension only to this type.
// app/src/PageTypes/MyElementPage.php
namespace App\Src\PageTypes;
class MyElementPage extends Page
{
}# app/_config/elements.yml
App\Src\PageTypes\MyElementPage:
extensions:
- DNADesign\Elemental\Extensions\ElementalPageExtensionMigrating existing page content
You can use the MigrateContentToElement BuildTask that is provided to assist with migrating content from pages to elements.
For more information on using this task refer to the content migration documentation.
Customize HTML and markup
The basic element area is rendered into the DNADesign/Elemental/Models/ElementalArea.ss template. This loops over
each of the element controller instances. Each controller instance will render $ElementHolder which represents
the element contained within a holder div. The wrapper div is the ElementHolder.ss template.
To customise the ElementEditor in the CMS you will need to use the Silverstripe CMS JS Injector to apply transformations to the necessary React components. See here for more information.
Limit allowed elements
You may wish to only enable certain elements for the CMS authors to choose from rather than the full set. This can be done according to various page types:
# app/_config/elements.yml
Page:
allowed_elements:
- DNADesign\Elemental\Models\ElementContentLikewise, you can exclude certain elements from being used.
# app/_config/elements.yml
Page:
disallowed_elements:
- YourCompany\YourModule\Elements\ElementContactSharing elements between pages
By default the page to element relationship is a "has one", meaning you cannot share elements between pages. If this functionality is desired, you could take a look at the silverstripe-elemental-virtual module which helps to achieve this.
